Monday, December 30, 2013
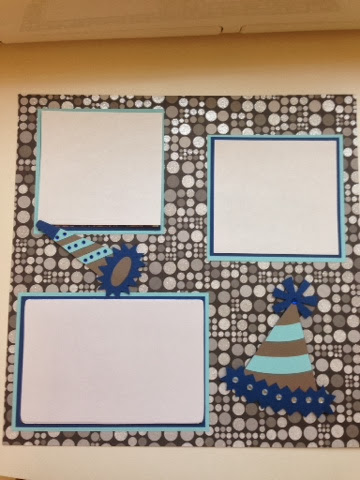
New Year's Eve layout
Tuesday, December 17, 2013
Holiday Stocking Project!
Now that the students are gone, I am sewing as fast as I can to complete this bucilla stocking kit. It's a Christmas gift, so hopefully I complete it in time! Highly recommend these kits. Really fun but time consuming project.
Sunday, December 15, 2013
Friday, March 8, 2013
Happy Birthday!
Happy Friday!!!!!! Here is another birthday card. This one is pretty easy and I plan on making a couple.
- The card base is cut at 5 1/2" by 4 1/4"
- The striped paper is also cut at 5 1/2" by 4 1/4". I bought the paper pack that the striped paper came from almost 4 years ago and have no idea what it is called!
- The cream paper is cut at 2" by 4"
- I rounded all the corners with my Corner Chomper
- I found the purple pearls in the Michael's dollar section. I wish I had bought more of them!
Have a lovely weekend!
Michelle
Thursday, March 7, 2013
Make a Wish!
Good evening all!
Today's card is made for CardzTV's Crafty Cardz Challenge #126 "Make a Wish!"
Today's card is made for CardzTV's Crafty Cardz Challenge #126 "Make a Wish!"
- The card is cut at 5 1/2' by 4 1/4' and it cut from black cardstock.
- The polka dot paper is from Recollections All Seasons paper.
- Mickey is cut at 3 1/4 from the Mickey and Friends Cricut cartridge.
- The Mickey balloons were punched from the Mickey EK Success punch.
Have a wonderful night :)
Michelle
Wednesday, February 27, 2013
What's new chickie?
I made this card for the Fantabulous Cricut Challenge Blog. The challenge was to make a project that involves a pun. I used the Create a Critter cartridge to complete this card!
- The card base is 5" x 5"
- The chick is cut at 4 1/2" from Create a Critter
- The stamp is from Scrappy Mom's Little Critters stamp set.
Michelle :)
Sunday, February 24, 2013
Wild About You!
Here is my first ever Scrappy Mom's submission! I am a huge fan of their stamps.
- The card base is 5 1/2" by 4 1/4". It's made from kraft card stock from Recollections.
- The next layer is a bright green by Recollections cut at 5 1/4" by 4".
- The next layer is cut at 5" by 3 3/4". I am sorry, I don't remember what paper collection it is from :(.
- The lion is from Create a Critter 2 and is cut at 3 1/2".
- The phrase is also from Create a Critter 2 and it's cut at 2".
Michelle
Glitter Sunglasses
My first post! I am really excited to share my projects and ideas here, especially since I have found a lot of my inspiration from other bloggers.
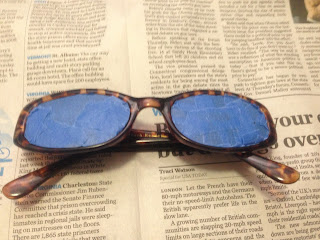
For my first project, I took an old pair of sunglasses and spruced them up a bit! The temperature hit the 40's today (whoo hoo) compared to the frigid temperatures we've had, and it got me really excited for spring! What better way than a newly decorated pair of shades.
You will need:
1 pair of sunglasses
Ultra Fine Glitter
Clear Drying Glue (I used mod podge because I already had it)
1 paint brush
Tape
Step #1: Tape the lenses of your glasses, front and back!
Step #2: Mix your glue and glitter together. I went a little too glue crazy for this pair. I suggest starting with a little of each and continue to add until you get the perfect mixture!
Step #3: Paint! Again, I went a little over board with the mod podge. Also, I would recommend using a smaller brush. The brush I used was the only one I had, and it did not help with the excessive amount of mod podge on my frames. Luckily, the mod podge dried fairly quickly!
Step #4: Spray with a glossy finish! I recommend Krylon Crystal Clear, which can be found at Michaels or I am sure your local craft store.
Step #5: Peel the tape off, and your ready to go! Not too shabby for my first try. Like I said, I went a little too crazy with the mod podge, so the glasses look a little chunky.
Here is the site I got my inspiration from:
http://becauseimaddicted.net/2012/04/diy-miu-miu-inspired-sunnies.html
Until next time!
Michelle
Subscribe to:
Comments (Atom)


.JPG)


.JPG)
.JPG)